Proxmox Installation
Time to install Proxmox on the server (see here for server details).
Proxmox has several server products, but the one needed for virtual machines (VMs) is Proxmox VE (PVE) - a free, open source, Debian-based virtualization platform.
Installing Proxmox VE is pretty straight forward and just like installing any other OS. They provide an ISO image, which is just Debian with their packages already installed on it.
- Download the ISO.
- Write the image to a flash drive with something like Etcher.
- Boot to it from the computer you want to use.
- Follow the install prompts.
Alternatively, the wiki mentions you can just install the Proxmox VE packages onto an existing Linux system, but if you’re enough of a power user to figure that out, me blabbing about it here won’t really help you.
Booting to the USB from my server was actually a little easier than a normal desktop. When the server is booting you have ample time to select options and boot media.
I went ahead and did the memory test (because it’s a server from ebay). That took quite a while and the server got very loud, so skip this step if you like.
Going through the installation…
After the EULA we move onto drive selection. The server I got has a RAID controller built in, so I needed to setup the drives before this step. When booting, the server gives a ROM configuration option to create/edit volumes. I did this ahead of time and setup the following:
- A single drive volume for the Proxmox install.
- A single drive volume for storing ISOs.
- All leftover drives in RAID 5 for storing VMs.
In retrospect, I would probably have the OS on two drives with RAID 1 just to be safe. It also would’ve been nice to have another drive or two setup for backups… but I don’t really feel like going back and redoing everything at this point.
If you don’t have a hardware RAID controller, you can setup RAID however you like via ZFS.
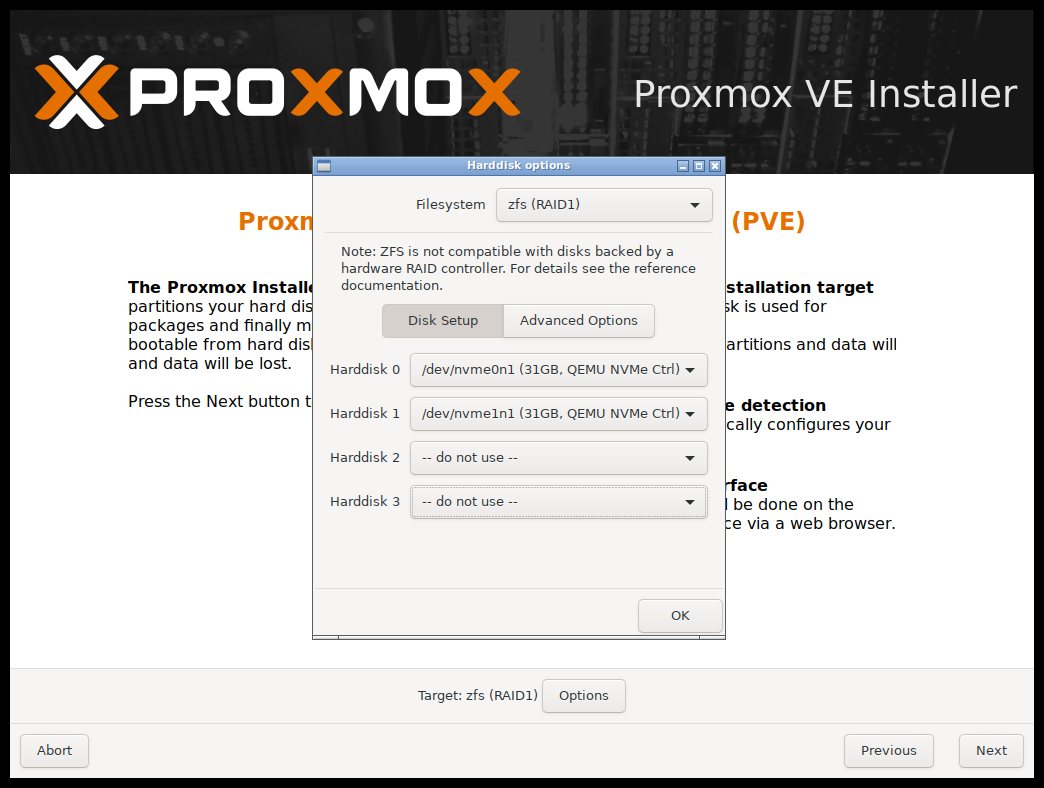
You can create addition ZFS RAID volumes for ISO, VMs, and backups after the install is complete (only if you don’t have a hardware RAID controller).
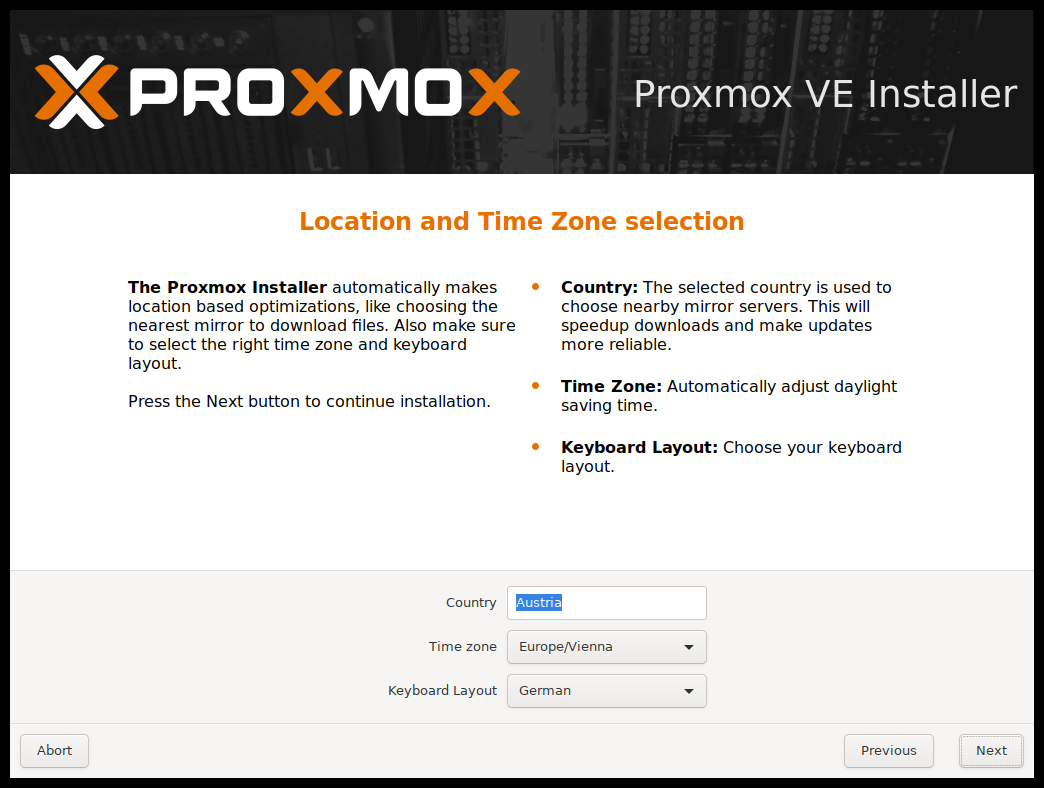
Next select location, timezone, and keyboard layout.
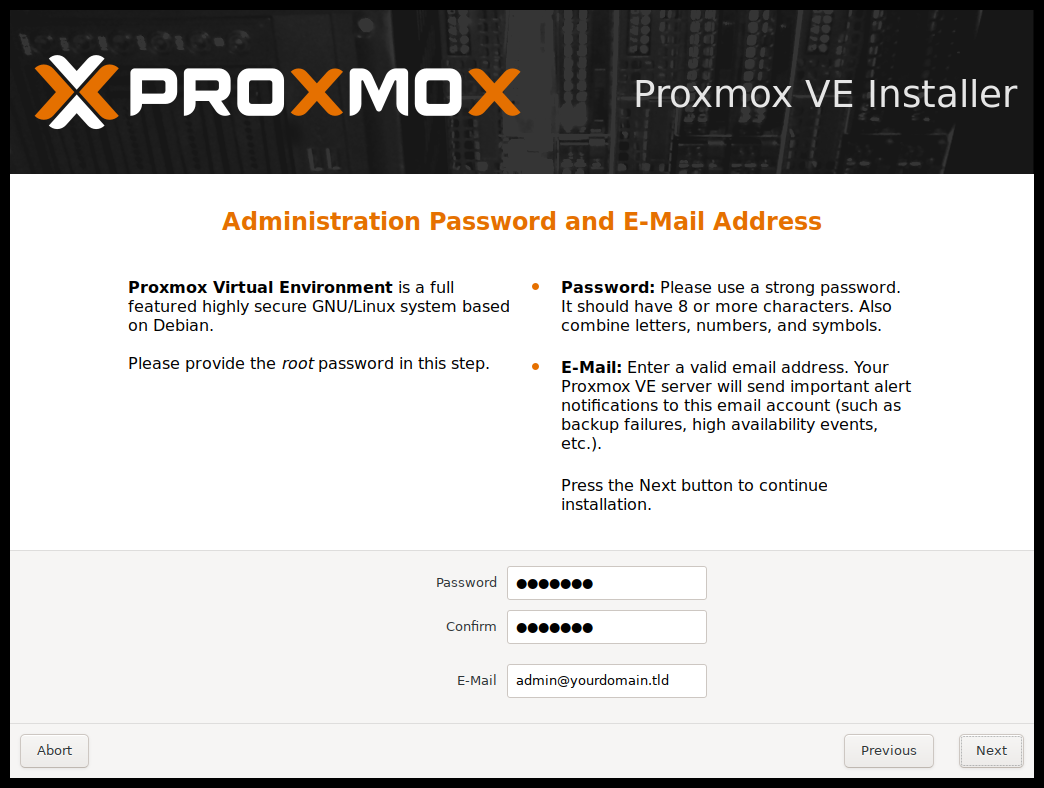
After that you’ll setup the root account password and also set an email address for PVE notifications and alerts.
After that is network configuration. This is where things didn’t go so well for me. Unfortunately, every wiki and install guide I’ve found just mashes the next button like it’s any other install wizard (which is how you get spyware btw) and gives no details whatsoever about this screen.
This really wouldn’t have been a problem except that my screen didn’t look like any other screenshot I’ve seen.
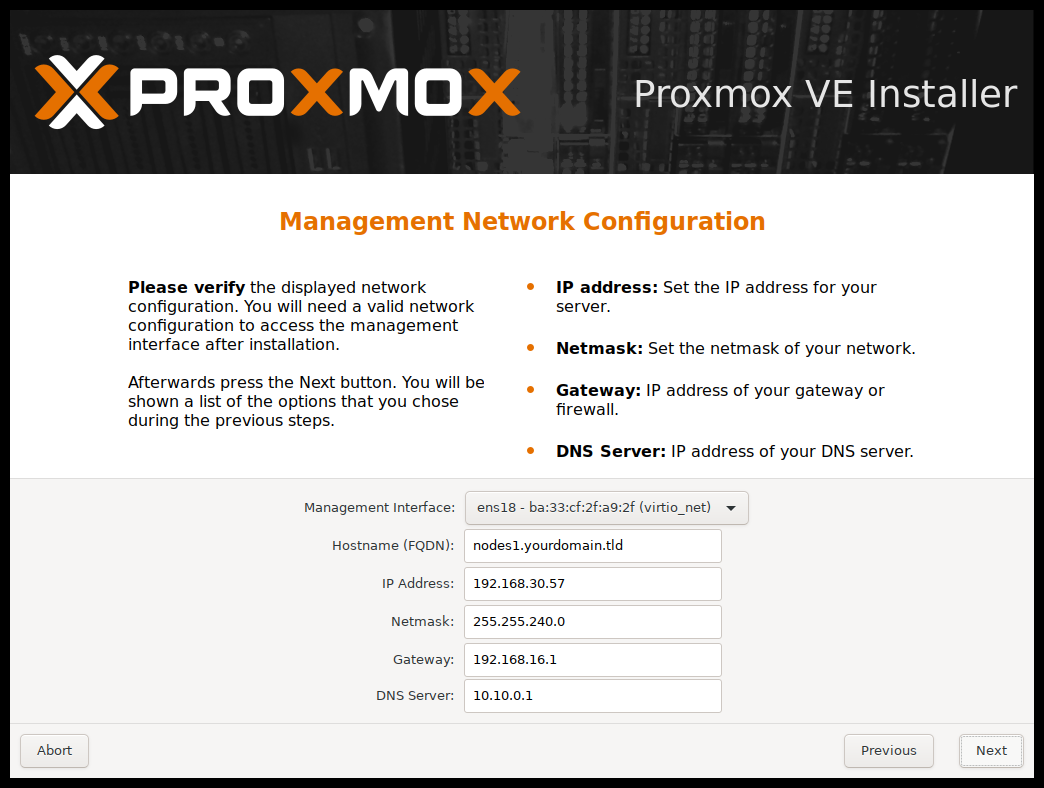
Most instructions are based on this:
Mine however, looked like this (and defaulted to IPv6):

This left me with a lot of questions. Like, why is IP Address a range? Where is the Netmask option? Is the IP Address option configuring a netmask via CIDR (Classless Inter-Domain Routing) notation for Proxmox and any VMs? Why aren’t other people seeing this screen?
Unfortunately, this is the best explanation I can give:
- is the Network Interface the Proxmox VE management server will listen to. If you have an ethernet cable plugged in, this is likely correct and doesn’t need to chage.
- is the hostname for your server. I went with pve.dl380g7.local so I could tell which machine it’s running on.
- is the IP address with netmask.
- is the gateway from your router.
- is the DNS from your router.
So for my part I went with 192.168.1.128/26 for the IP, which I assume leaves 192.168.1.128 through 192.168.1.191 available for Proxmox to use.
For the gateway and DNS I just entered my router (ip route on Linux, ipconfig on Windows).
That worked for me, but your mileage may vary here. I’m sure any network-savy people are cringing at my lack of understanding, so I’ll just throw a little fuel on that fire and point out that was my second attempt to get it working…
Thankfully that’s the last real step and now it’s just confirming, waiting for PVE to finishing installing, and reboot.
So I waited the eternity it takes for my server to reboot and was greeted with a login screen telling me to go to a browser with the IP I set earlier at port 8006. Doing so on my main dekstop brought me to a Proxmox login screen. I then logged in as the root account setup during install and boom - success! Proxmox is installed and ready to play with (i.e. break at least twice).
In the next post I’ll talk about the PVE portal, configurations, and setting up VMs.